
 Full manual PDF


Preparation before operation
Preparing the remote controller
 CAUTION
Incorrect handling of batteries can result in injury from battery leakage, rupturing or heating, or lead to equipment failure.
Please observe the following precautions and use safely.
- If the alkaline solution from the batteries should get in the eyes, do not rub the eyes. Instead, immediately flush the eyes with tap water and seek the attention of a medical professional.
- Keep batteries out of the reach of children. In the event that batteries are swallowed, seek the immediate attention of a medical professional.
- Do not expose batteries to heat or fire. Do not disassemble or modify batteries. The insulation or gas release vent inside the battery may be damaged, resulting in battery leakage, rupturing, or heating.
- Do not damage or peel off labels on the batteries.
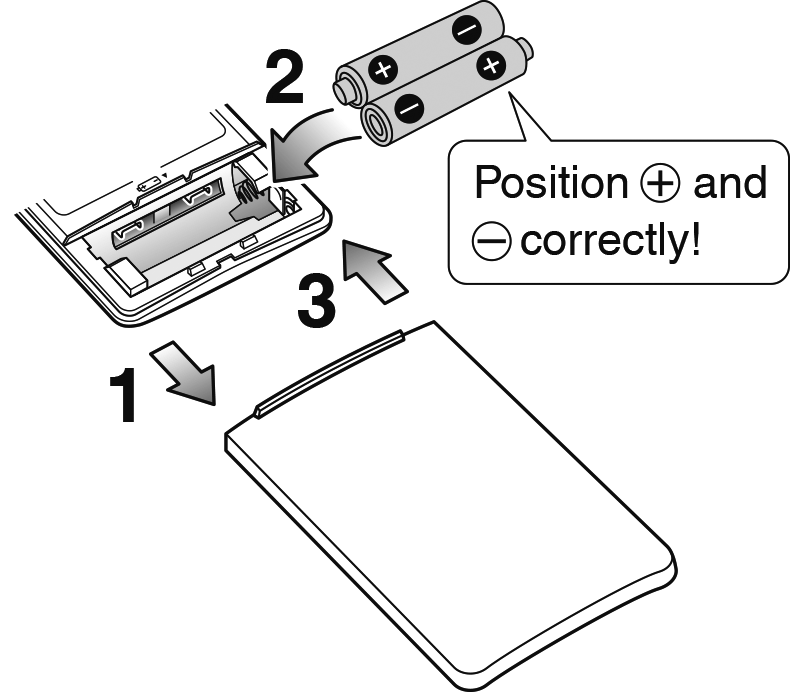
To insert the batteries
- Slide the front cover to take it off.
- Insert 2 dry batteries AAA.LR03 (alkaline).
-
Replace the front cover.
NOTE
Notes on batteries
- To avoid possible injury or damage from battery leakage or rupturing, remove the batteries when not using the product for long periods of time.
- The standard replacement time is 1 year. Both batteries should be replaced at the same time. Be sure to replace them with new size AAA. LR03 (alkaline) batteries.
-
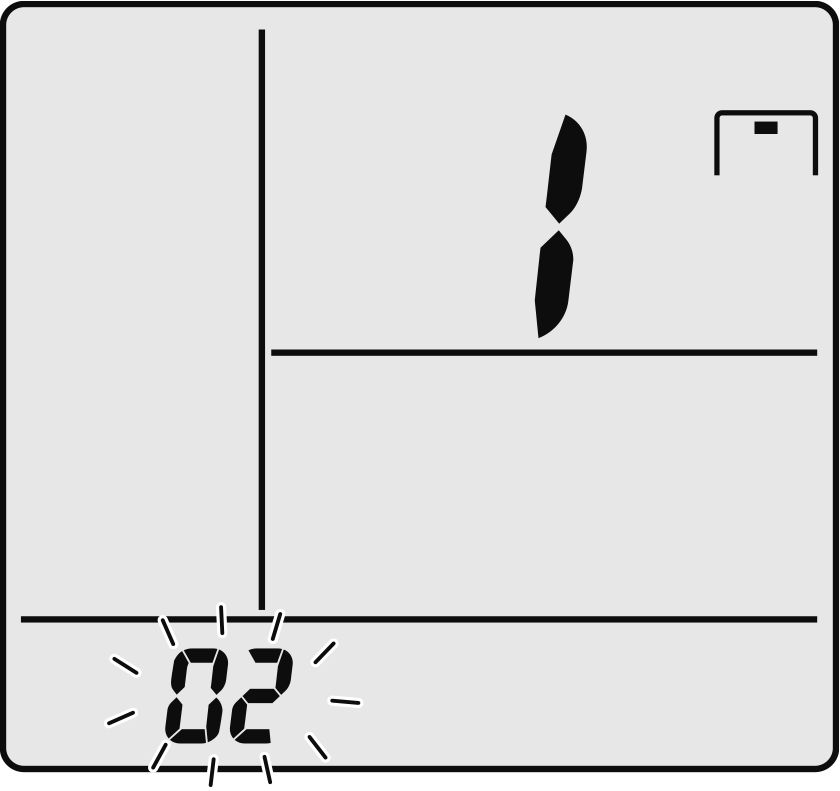
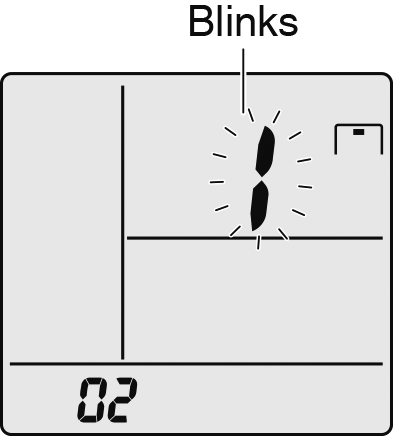
When battery power has run out, “
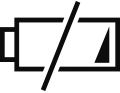 ” will begin blinking as an alert that the batteries need replacing. In some cases, when battery consumption is accelerated owing to usage conditions, signal reception may decline before “ ” begins blinking.
-
The batteries supplied with the remote controller are for initial operation. The batteries may run out in less than 1 year.
The usable period of the batteries may be short depending on the manufacture date of the air conditioner.
Notes on the remote controller
- Do not drop the remote controller. Do not get it wet.
- Dust on the signal transmitter or receiver will reduce the sensitivity. Wipe off dust with a soft cloth.
-
Signal communication may be disabled if an electronic-starter-type fluorescent lamp (such as an inverter-type lamp) is in the room.
Consult your dealer if that is the case. - If the remote controller signals happen to operate another appliance, move that appliance to somewhere else, or consult your dealer.
Close
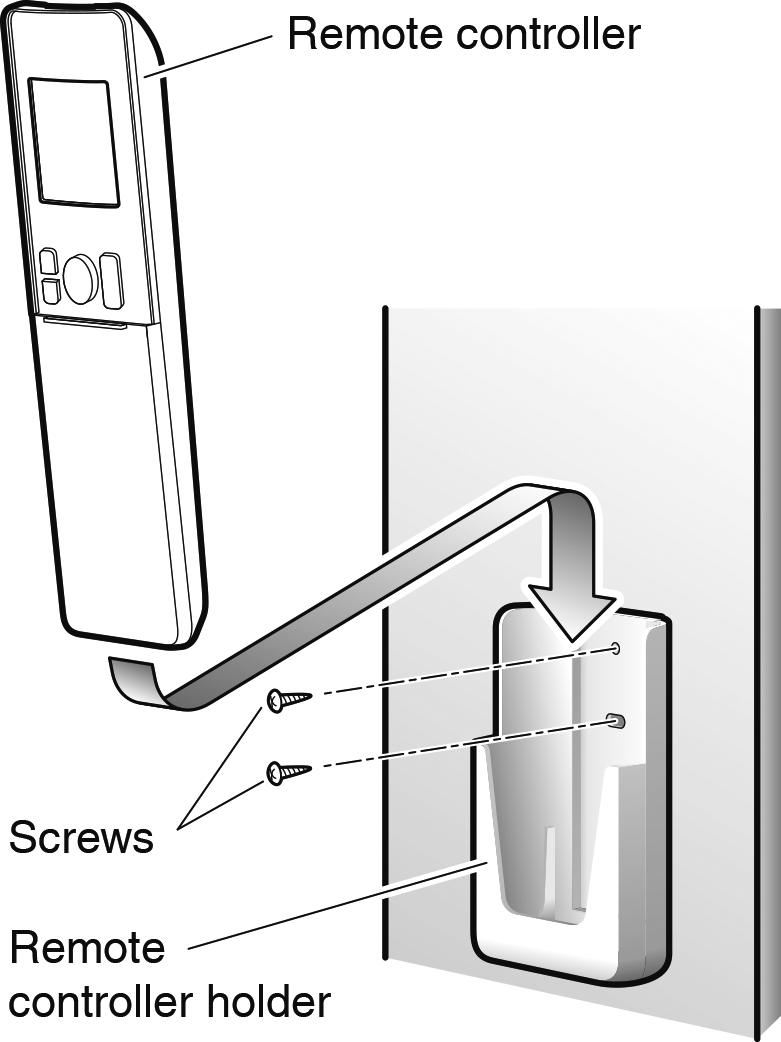
Preparing the remote controller holder
To fix the remote controller holder to a wall
- Choose a place from where the signals reach the unit.
- Fix the holder to a wall, a pillar, or similar location with the screws supplied with the holder.
-
Place the remote controller in the remote controller holder.
Close
Attaching the small filters (Air quality filter (enzyme blue with PM2.5))
Attach the Air quality filter (enzyme blue with PM2.5)
- If attaching the separately sold filters, attach them before turning the power on.
Close
Turning on the circuit breaker
Turn on the circuit breaker
- After the power is turned on, the flaps of the indoor unit open and close once to set the reference position.
Close
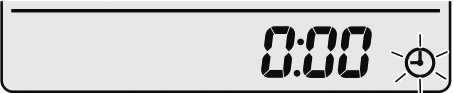
Setting the clock
To set the clock
-
Press
 .
.
-
“
 ” appears on the LCD.
-
“
 ” blinks.
-
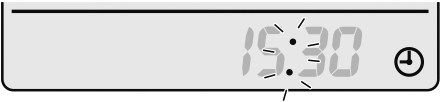
“
-
Press
 to set the clock to the present time.
-
Holding down
 or
or  rapidly increases or decreases the displayed time.
-
Holding down
-
Press .
-
Point the remote controller at the indoor unit when pressing the button.
-
“
 ” blinks.
-
Point the remote controller at the indoor unit when pressing the button.
Close
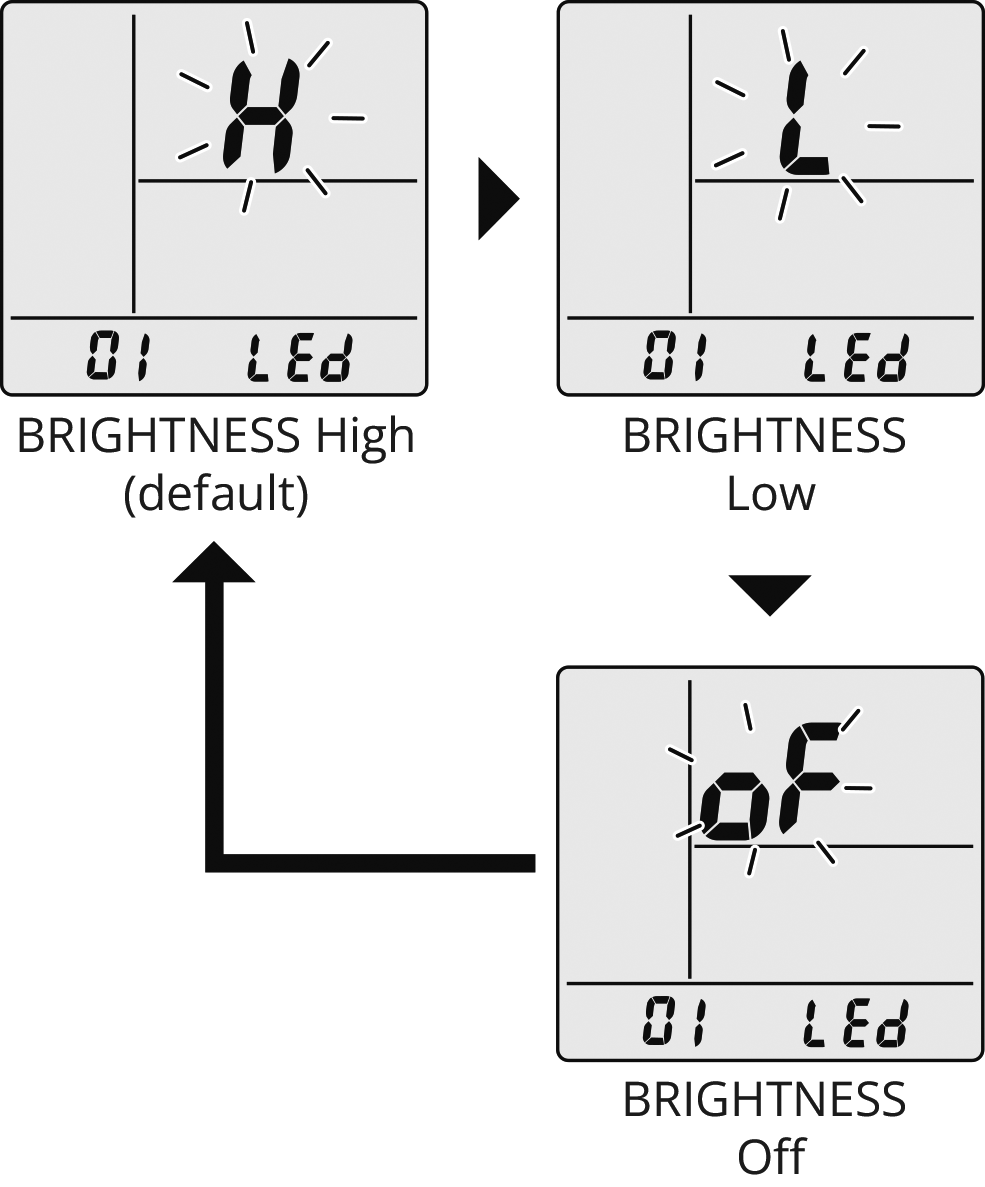
Setting the brightness of the indoor unit lamps
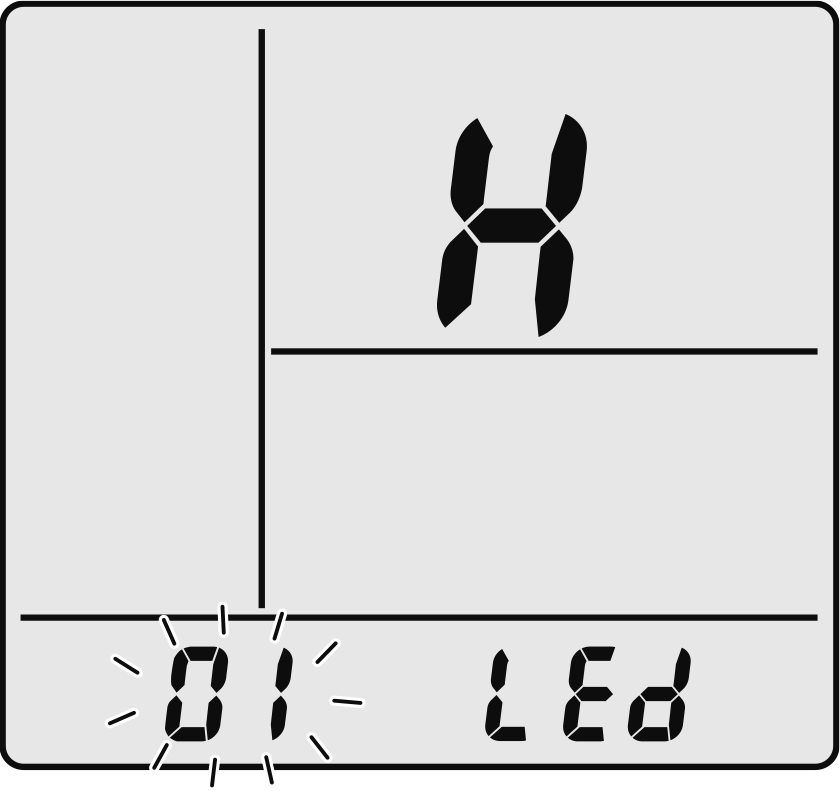
To set the brightness of the indoor unit lamps
Adjust the brightness of the indoor unit display as desired, or turn OFF the display.
To set
-
Press
 and hold the button for 2 seconds.
-
“
 ” appears on the LCD.
-
“
 ” (menu number) blinks.
-
“
-
Press
 or
or  and select menu number
  .
.
-
Press to confirm the selected setting.
-
Press or and select the desired brightness as follows:
-
Press again.
- Brightness will be set to the chosen value.
-
Press
 to return to the default screen.
NOTE
Note on setting the brightness of the indoor unit lamps
-
The display automatically returns to the default screen after 60 seconds. To return to the default screen sooner, press twice.
Close
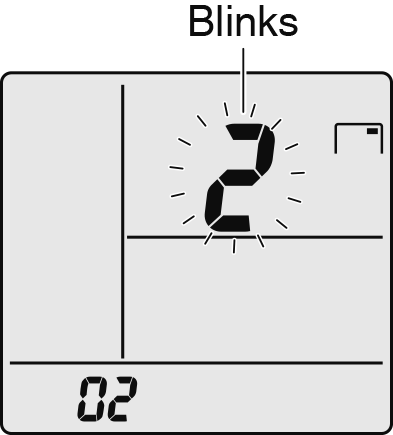
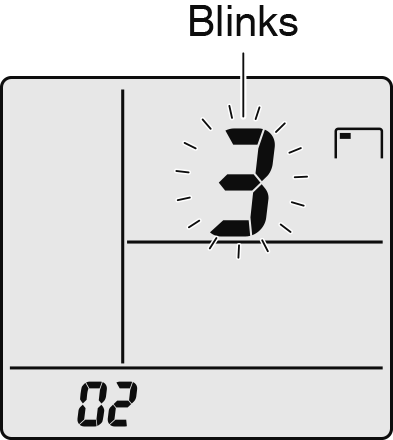
Setting the position where the indoor unit is installed
To set the position where the indoor unit is installed
Set the indoor unit position to avoid direct airflow to walls.
To set
-
Press and hold the button for 2 seconds.
-
“ ” appears on the LCD.
-
“ ” (menu number) blinks.
-
“
-
Press or and select menu number
 .
.
-
“
 ” appears on the LCD.
-
“
 ” (menu number) blinks.
-
“
-
Press to confirm the selected setting.
-
Press or and select the indoor unit position as follows:
Installation position (3 work situations)
| LCD/Position number | Installation position |
|---|---|
| If the unit is installed in the middle of the wall (factory default setting) | |
|
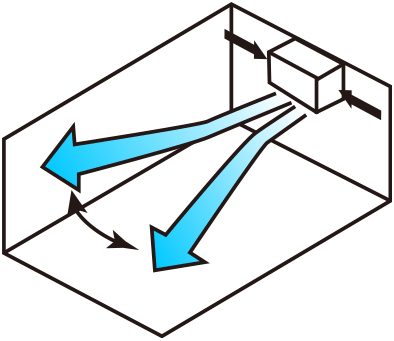
|
| If the unit is installed ≤500 mm from the wall on the right | |
|
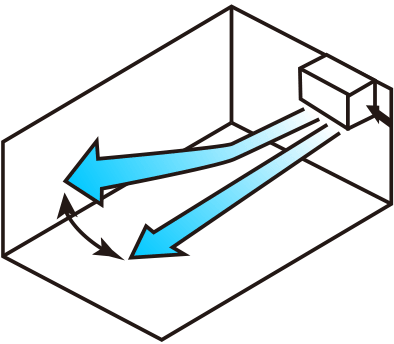
|
| If the unit is installed ≤500 mm from the wall on the left | |
|

|
- The airflow range will be adjusted to avoid direct contact with the wall.
-
Press again.
- The installation position of the indoor unit will be set.
-
Press to return to the default screen.
NOTE
Notes on setting the position where the indoor unit is installed
-
The display automatically returns to the default screen after 60 seconds. To return to the default screen sooner, press twice.
- The airflow direction is properly controlled by inputting a number representing the installation position of the indoor unit into the remote controller.
- If you do not set the right corner and left corner correctly, the airflow direction may not be properly controlled in some airflow settings.
-
The airflow direction range at the horizontal airflow setting (airflow direction that can be selected with
 ) will change according to the settings for the installation position.
Close
